Filecoin 钱包开发小记
2022-3-2
Filecoin 钱包开发
好久没写blog了,最近一直没有时间写。这次就对这段时间对filecoin钱包对开发内容做一个总结。
不想看细节的,直接跳到最后一节(filecoin发送,获取余额等rpc操作,这里包含了完整代码)。
Filecoin根据助记词生成账号
和其他公链差不多,本质上来讲,filecoin的助记词也是通过bip39生成的。
bip39生成助记词
// 256 so it generate 24 words
bip39.generateMnemonic(256)
根据助记词获取地址(也可以直接使用第三方包,直接跳过此节)
大同小异的操作,一个助记词有无限多的派生路径,filecoin的主网使用的是461。
// 先根据助记词生成种子seed
const seed = bip39.mnemonicToSeedSync(mnemonic, password)
const masterKey = bip32.fromSeed(seed)

// 通过path 获取childKey
// `m/44'/${networkCode}'/0'/0/${i}`
// filecoin 主网的networkCode是461,测试网就用1就好了
// 一个助记词可以生成多个账号,i就是第几个,从0开始
const childKey = masterKey.derivePath(path)
获取到childKey后,就可以根据它进行一系列的加解密的操作,过程中用了一些常用的加密库
const blake = require('blakejs')
const base32Encode = require('base32-encode')
const secp256k1 = require('secp256k1')

function getPayloadSECP256K1(uncompressedPublicKey) {
  // blake2b-160
  const blakeCtx = blake.blake2bInit(20)
  blake.blake2bUpdate(blakeCtx, uncompressedPublicKey)
  return Buffer.from(blake.blake2bFinal(blakeCtx))
}

function getChecksum(payload) {
  const blakeCtx = blake.blake2bInit(4)
  blake.blake2bUpdate(blakeCtx, payload)
  return Buffer.from(blake.blake2bFinal(blakeCtx))
}

const pubKey = secp256k1.publicKeyCreate(privateKey)

let uncompressedPublicKey = new Uint8Array(65)
secp256k1.publicKeyConvert(pubKey, false, uncompressedPublicKey)
uncompressedPublicKey = Buffer.from(uncompressedPublicKey)

const payload = getPayloadSECP256K1(uncompressedPublicKey)
const checksum = getChecksum(Buffer.concat([Buffer.from('01', 'hex'), payload]))

// 如果是主网就前面加f1,测试网就是t1
let prefix = 'f1'
if (testnet) {
  prefix = 't1'
}

const address =
      prefix +
      base32Encode(Buffer.concat([payload, checksum]), 'RFC4648', {
        padding: false,
      }).toLowerCase()

this.publicKey = uncompressedPublicKey // Buffer
this.privateKey = privateKey // Buffer
this.address = address // String
this.public_hexstring = this.publicKey.toString('hex') // String
this.private_hexstring = this.privateKey.toString('hex') // String
this.public_base64 = this.publicKey.toString('base64') // String
this.private_base64 = this.privateKey.toString('base64') // String
这样,我们就可以根据助记词获取到filecoin的地址,publicKey 和privateKey了。
使用第三方包获取帐号信息
这里我们使用filecoin的工具包@zondax/filecoin-signing-tools来获取帐号信息
import rustModule from '@zondax/filecoin-signing-tools/js';

getMnemonicInfo(mnemonic) {
  // mainnet // 第一个账户
  const networkCode = 461; // 461 是filecoin 主网,1 是filecoin测试网
  const i = 0; // 可以生成多个地址,这里我们获取第0个账号信息
  const path = `m/44'/${networkCode}'/0'/0/${i}`
  this.privateKeyObj = rustModule.keyDerive(mnemonic, path, '')
  this.privateKey = this.privateKeyObj.private_hexstring
  this.address = this.privateKeyObj.address
}
filecoin发送,获取余额等rpc操作。
这里我们直接使用glif开源的工具包来开发,有兴趣的小伙伴可以直接去看源码来了解更多的细节。
这里我们先定义好filecoin的provider
新建一个枚举文件,工具文件,provider的js文件 utils/constants.js utils/createPath.js utils/walletSubproviders.js
// utils/constants.js
export const HD_WALLET = 'HD_WALLET'
export const MAINNET = 'f'
export const TESTNET = 't'
export const MAINNET_PATH_CODE = 461
export const TESTNET_PATH_CODE = 1
utils/constants.js 定义一些枚举信息
// utils/createPath.js
import { MAINNET_PATH_CODE, TESTNET_PATH_CODE } from './constants'

const createPath = (networkCode, i) => {
  if (networkCode !== MAINNET_PATH_CODE && networkCode !== TESTNET_PATH_CODE)
    throw new Error('Invalid network code passed')
  return `m/44'/${networkCode}'/0'/0/${i}`
}

export default createPath
utils/createPath.js 抽离 path的生成,根据networkCode来生成不同的地址
// utils/walletSubproviders.js
import rustModuleJs from '@zondax/filecoin-signing-tools/js';
import createPath from './createPath'
import { HD_WALLET, TESTNET, TESTNET_PATH_CODE, MAINNET_PATH_CODE, MAINNET } from './constants'

const createHDWalletProvider = (rustModule) => {
    return (mnemonic) => {
        // here we close over the private variables, so they aren't accessible to the outside world
        const MNEMONIC = mnemonic
        return {
            getAccounts: async (network = MAINNET, nStart = 0, nEnd = 5) => {
                const accounts = []
                for (let i = nStart; i < nEnd; i += 1) {
                    const networkCode =
                        network === TESTNET ? TESTNET_PATH_CODE : MAINNET_PATH_CODE
                    accounts.push(
                        rustModule.keyDerive(MNEMONIC, createPath(networkCode, i), '')
                        .address
                    )
                    console.log(rustModule.keyDerive(MNEMONIC, createPath(networkCode, i), ''));
                }
                return accounts
            },

            sign: async (filecoinMessage, path) => {
                const {
                    private_hexstring
                } = rustModule.keyDerive(MNEMONIC, path, '')
                const {
                    signature
                } = rustModule.transactionSign(
                    filecoinMessage,
                    Buffer.from(private_hexstring, 'hex').toString('base64')
                )
                return signature.data
            },
            getAccountsData: async (network = MAINNET, nStart = 0, nEnd = 5) => {
                const accounts = []
                for (let i = nStart; i < nEnd; i += 1) {
                    const networkCode =
                        network === TESTNET ? TESTNET_PATH_CODE : MAINNET_PATH_CODE
                    accounts.push(
                        rustModule.keyDerive(MNEMONIC, createPath(networkCode, i), '')
                    )
                }
                return accounts
            },
            type: HD_WALLET,
            a: 1
        }
    }
}

const prepareSubproviders = (rustModule) => ({
    HDWalletProvider: createHDWalletProvider(rustModule)
})


export const walletSubproviders = prepareSubproviders(rustModuleJs)
接下来,我们只需要继承@glif/filecoin-wallet-provider的Filecoin的类即可。
所以新建一个index.js
// index.js
import Filecoin from '@glif/filecoin-wallet-provider'
import { BigNumber, FilecoinNumber } from '@glif/filecoin-number'
import { validateAddressString } from '@glif/filecoin-address'
import { Message } from '@glif/filecoin-message'
import { validateMnemonic } from 'bip39'
import rustModule from '@zondax/filecoin-signing-tools/js';
import { walletSubproviders } from './utils/walletSubproviders';
import createPath from './utils/createPath'
import { MAINNET_PATH_CODE } from './utils/constants'

class customFilecoin extends Filecoin {
    constructor(mnemonic, apiAddress, token) {
        super(walletSubproviders.HDWalletProvider(mnemonic), {apiAddress, token})
        this.apiAddress = apiAddress
        this.address = ''
        this.getMnemonicInfo(mnemonic)
    }

    getMnemonicInfo(mnemonic) {
        // mainnet // 第一个账户
        const networkCode = MAINNET_PATH_CODE
        this.privateKeyObj = rustModule.keyDerive(mnemonic, createPath(networkCode, 0), '')
        this.privateKey = this.privateKeyObj.private_hexstring
        this.address = this.privateKeyObj.address
    }

    async getBalanceToNumber() {
        const balance = await this.getBalance(this.address)
        return BigNumber(balance).toNumber()
    }

    async getGasFee(params) {
        const message = new Message(params)
        const msgWithGas = (await this.gasEstimateMessageGas(message.toLotusType())).toLotusType()
        return msgWithGas
    }

    async send(toAddress, value, gasPremium, gasFeeCap, gasLimit) {
        if (toAddress && validateAddressString(toAddress)) {
          // 先获取nonce
            const nonce = await this.getNonce(this.address)
            // 定义message对象
            let baseMessage = {
                to: toAddress,
                from: this.address,
                value: new FilecoinNumber(value, 'fil').toAttoFil(),
                method: 0,
                nonce,
                params: ""
            }
            // 	如果传入gasPremium,gasFeeCap,gasLimit,就使用,不然就从链上根据message预估
            if (gasPremium) {
                baseMessage.gasPremium = gasPremium
                baseMessage.gasFeeCap = gasFeeCap
                baseMessage.gasLimit = gasLimit
            } else {
                const msgWithGas = await this.getGasFee(baseMessage)
                baseMessage.gasPremium = msgWithGas.GasPremium
                baseMessage.gasFeeCap = msgWithGas.GasFeeCap
                baseMessage.gasLimit = msgWithGas.GasLimit
            }

            const message = new Message(baseMessage)

            const signedMessage = await this.wallet.sign(
                message.toSerializeableType(),
                createPath(MAINNET_PATH_CODE, 0)
            )
            const messageObj = message.toLotusType()
            // 模拟发送,检查结果
            const validMsg = await this.simulateMessage(message.toLotusType())
            if (validMsg) {
                // 实际发送
                try {
                    const msgCid = await this.sendMessage({
                        Message: message.toLotusType(),
                        Signature: {
                            // only supports secp256k1 keys for now
                            Type: 1,
                            Data: signedMessage
                        }
                    })
                    messageObj.cid = msgCid['/']
                    return messageObj.cid
                } catch (error) {
                    throw new Error(error)
                }

            }
        } else {
            throw new Error('error address')
        }
    }
}
这样,我们就完成了Filecoin钱包的主体开发。
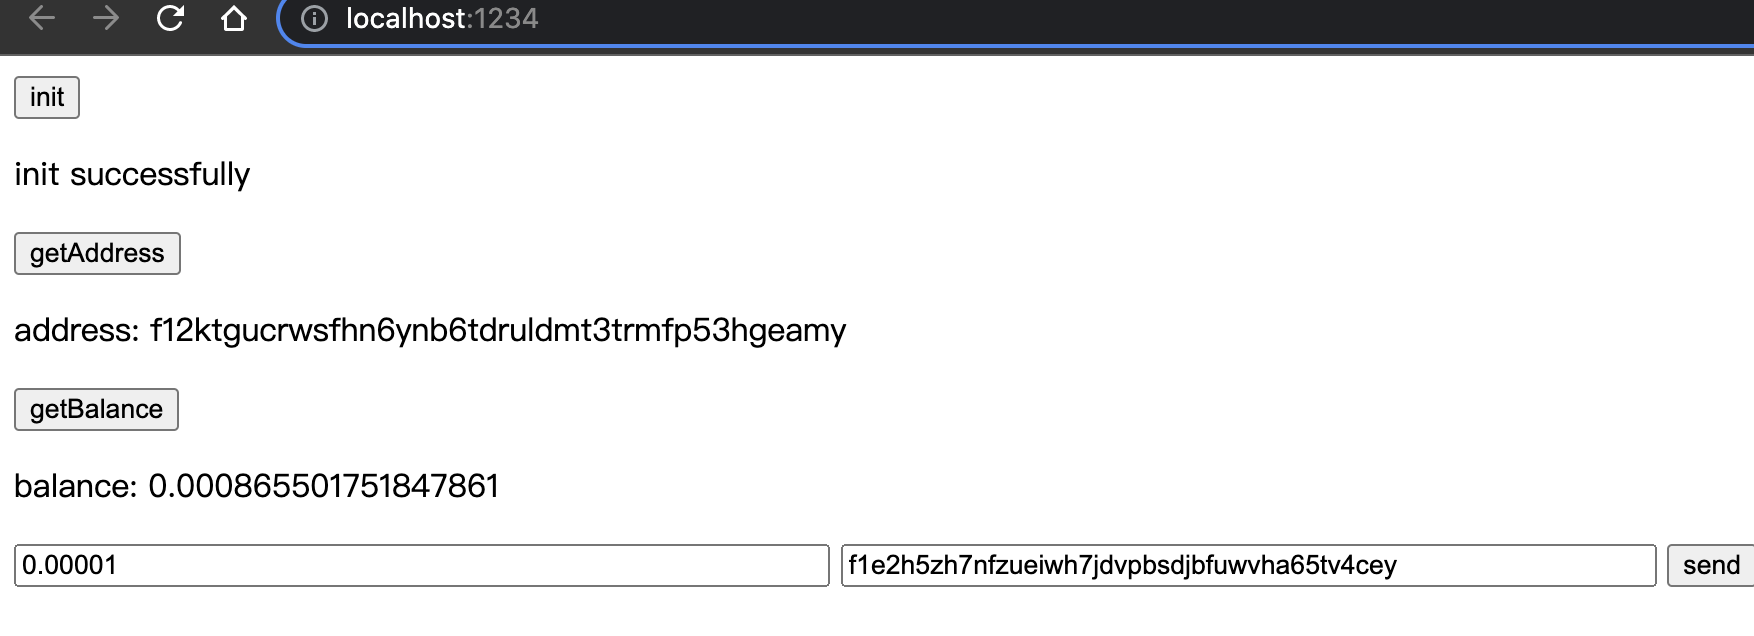
接下来,我们看看要怎么调用钱包和如何发送fil。
// example

// init 传入 mnemonic(助记词),apiAddress(rpc地址),token(不传token,只能读,如果要在链上写,必须要rpc地址的token)
const wallet = new customFilecoin(mnemonic.trim(), apiAddress, token)

console.log(wallet.address)

async getBalance() {
  const balance = await wallet.getBalanceToNumber()
  return balance
}

// 传入toAddress, amount, gasPremium, gasFeeCap, gasLimit
// gasPremium, gasFeeCap, gasLimit 三个参数如果不传入,将从链上估算gasFee
// 注意:gasPremium, gasFeeCap 加引号使用字符串,gasLimit不需要加引号,使用number类型
// 返回hash
async send(toAddress, amount, gasPremium, gasFeeCap, gasLimit) {
  try {
    const send = await wallet.send(toAddress, +amount, gasPremium, gasFeeCap, gasLimit)
  } catch (error) {
    // console.log({error})
  }
  return send
}

// send('f1e2h5zh7nfzueiwh7jdvpbsdjbfuwvha65tv4cey', '0.00001', '101722', '102776', 2626647)

全部结束,over!!!

评论区