
nodejs编译部署合约
2022-8-30
Node.js 编译并部署智能合约
使用solc-js编译部署合约。
初始化项目
先建好文件夹和package.json
mkdir test_deploy && cd test_deploy
npm init -y
添加web3,solc的依赖
yarn add web3 solc
看好自己安装的solc的版本号,需要和待会编写使用solidity的版本号一致
cat package.json
这时候终端显示
{
  "name": "test_deploy",
  "version": "1.0.0",
  "description": "",
  "main": "index.js",
  "scripts": {
    "test": "echo \"Error: no test specified\" && exit 1"
  },
  "keywords": [],
  "author": "",
  "license": "ISC",
  "dependencies": {
    "solc": "^0.8.16",
    "web3": "^1.7.5"
  }
}
那待会我们就使用solidity ^0.8.16;
编写智能合约
这里我们就写一个特别简单的智能合约便于学习,新建callMe.sol文件。
// SPDX-License-Identifier: SEE LICENSE IN LICENSE
pragma solidity ^0.8.16;

contract CallMe {
    uint256 public CallMeNum = 0;

    function Ring() public {
        CallMeNum += 1;
    }
}
看代码,我们就是简单实现了一个计数功能,并没有做很多的逻辑。大家可以根据自己的需求来改。
编译并部署智能合约(compile && deploy)
新建index.js文件
这里我们分为两步
编译sol文件(compile)
const solc = require('solc')
const fs = require('fs')
const source = fs.readFileSync('./callMe.sol', 'utf-8')
var input = {
    language: 'Solidity',
    sources: {
        'callMe.sol': {
            content: source
        }
    },
    settings: {
        outputSelection: {
            '*': {
                '*': ['*']
            }
        }
    }
};
const compiled = JSON.parse(solc.compile(JSON.stringify(input)))
const abi = compiled.contracts['callMe.sol']['CallMe']['abi']
const bytecode = compiled.contracts['callMe.sol']['CallMe']['evm']['bytecode']['object']
console.log({abi, bytecode});
这里我们执行编译,看到输出如下
{
  abi: [
    {
      inputs: [],
      name: 'CallMeNum',
      outputs: [Array],
      stateMutability: 'view',
      type: 'function'
    },
    {
      inputs: [],
      name: 'Ring',
      outputs: [],
      stateMutability: 'nonpayable',
      type: 'function'
    }
  ],
  bytecode: '60806040526000805534801561001457600080fd5b50610151806100246000396000f3fe608060405234801561001057600080fd5b50600436106100365760003560e01c806387b3be7d1461003b5780639c182ede14610045575b600080fd5b610043610063565b005b61004d61007e565b60405161005a919061009d565b60405180910390f35b600160008082825461007591906100e7565b92505081905550565b60005481565b6000819050919050565b61009781610084565b82525050565b60006020820190506100b2600083018461008e565b92915050565b7f4e487b7100000000000000000000000000000000000000000000000000000000600052601160045260246000fd5b60006100f282610084565b91506100fd83610084565b9250828201905080821115610115576101146100b8565b5b9291505056fea26469706673582212208ff3edded4043aadbd02cd69f8cc8e59389aae986688e86065398a8c065e3c7464736f6c63430008100033'
}
这样我们就得到了智能合约的abi和bytecode。
部署合约(deploy)
const Web3 = require('web3');

const web3 = new Web3('https://goerli.infura.io/v3/9aa3d95b3bc440fa88ea12eaa4456161')
const goerli_id = 5

const privateKey = '0x62.....58' // 私钥

const deployAsync = async () => {
    // 函数里abi,bytecode就是合约编译出来的abi和bytecode
    const callMeContract = new web3.eth.Contract(abi)
    const deploy = callMeContract.deploy({ data: bytecode })
    const estimateGas = await deploy.estimateGas() // 从链上预跑估算所需的gasLimit
    const sign = await web3.eth.accounts.signTransaction({
        data: bytecode,
        gas: estimateGas * 2, // 为了防止gas不够,这里我们给两倍的gas
        common: {
            customChain: {
                name: 'goerli',
                chainId: goerli_id,
                networkId: goerli_id
            }
        }
    }, privateKey)
    web3.eth.sendSignedTransaction(sign.rawTransaction)
        .on('transactionHash', function (hash) {
            console.log('transactionHash', { hash });
        })
        .on('receipt', function (receipt) {
            console.log('receipt', { receipt });
        })
        .on('error', console.error);
}

deployAsync()
ok,代码写完,下面我们执行编译部署
node index.js
执行结果:
transactionHash {
  hash: '0xd76cd84f36c484128d74830c34441558e810126f4329664b6ecb79d67a9d5646'
}
receipt {
  receipt: {
    blockHash: '0x9ebc644fde5840ea2f5520e647ce135ddc464e926ed38ab98d4d2c83552c4215',
    blockNumber: 7496928,
    contractAddress: '0x2F644b5f5cee3174065264211B7c6466fDC997a9',
    cumulativeGasUsed: 17612622,
    effectiveGasPrice: 133182174,
    from: '0x3ecaa09dd6b8828607bba4b1d7055ea1143f8b94',
    gasUsed: 127863,
    logs: [],
    logsBloom: '0x00000000000000000000000000000000000000000000000000000000000000000000000000000000000000000000000000000000000000000000000000000000000000000000000000000000000000000000000000000000000000000000000000000000000000000000000000000000000000000000000000000000000000000000000000000000000000000000000000000000000000000000000000000000000000000000000000000000000000000000000000000000000000000000000000000000000000000000000000000000000000000000000000000000000000000000000000000000000000000000000000000000000000000000000000000000',
    status: true,
    to: null,
    transactionHash: '0xd76cd84f36c484128d74830c34441558e810126f4329664b6ecb79d67a9d5646',
    transactionIndex: 61,
    type: '0x0'
  }
}
这里我们可以看到部署成功了,合约地址是0x2F644b5f5cee3174065264211B7c6466fDC997a9。
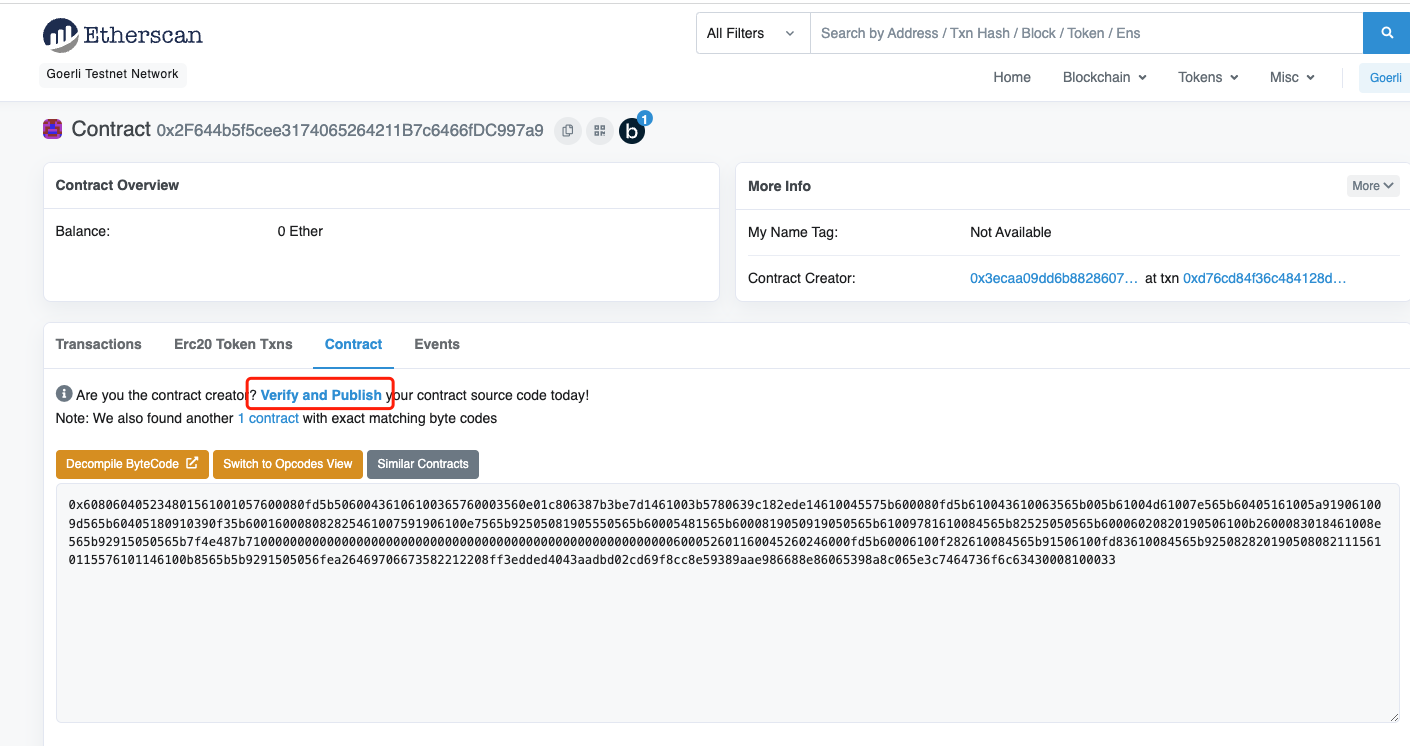
使用区块浏览器查看
部署完毕后,使用区块浏览器来查看我们刚才部署的合约。https://goerli.etherscan.io/address/0x2f644b5f5cee3174065264211b7c6466fdc997a9
这里我们点击Verify and Publish
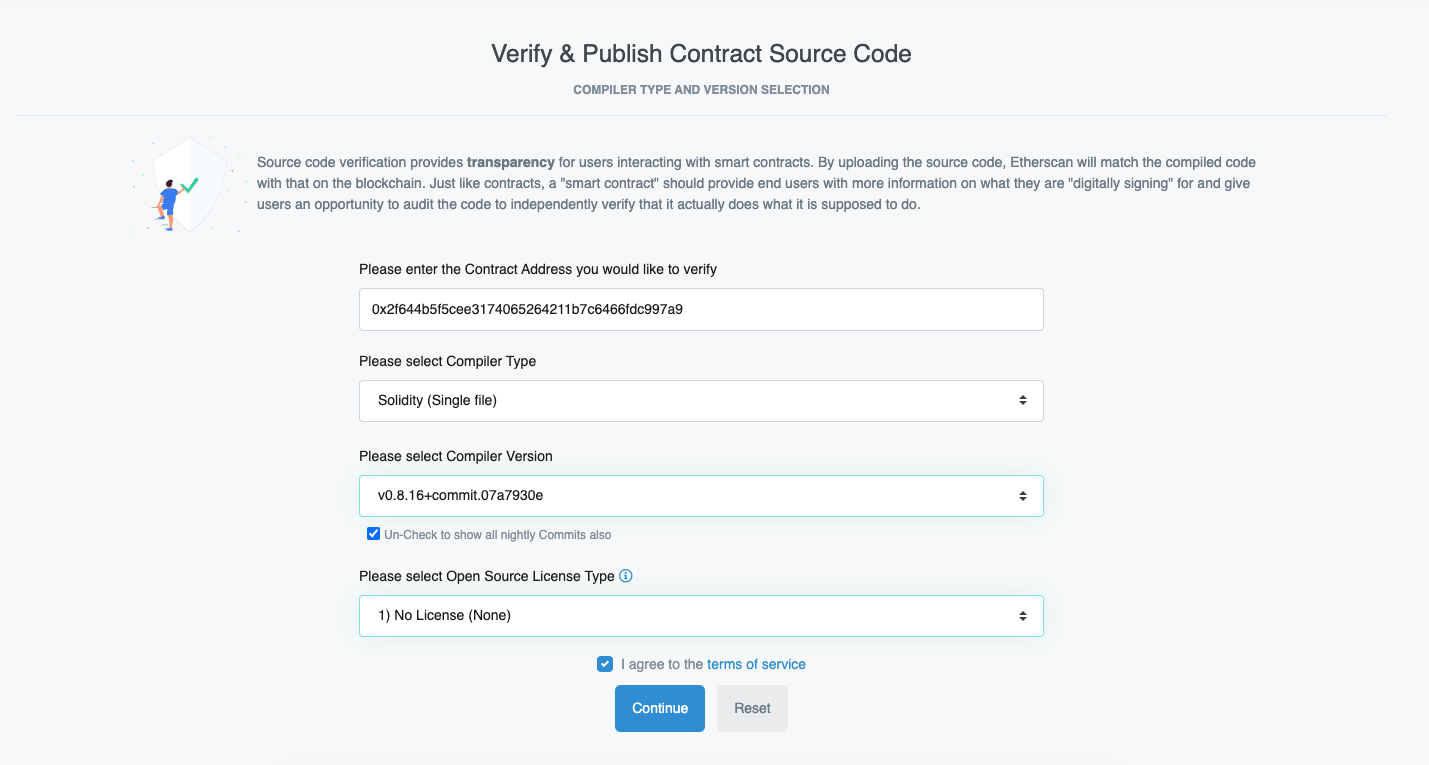
填好表单
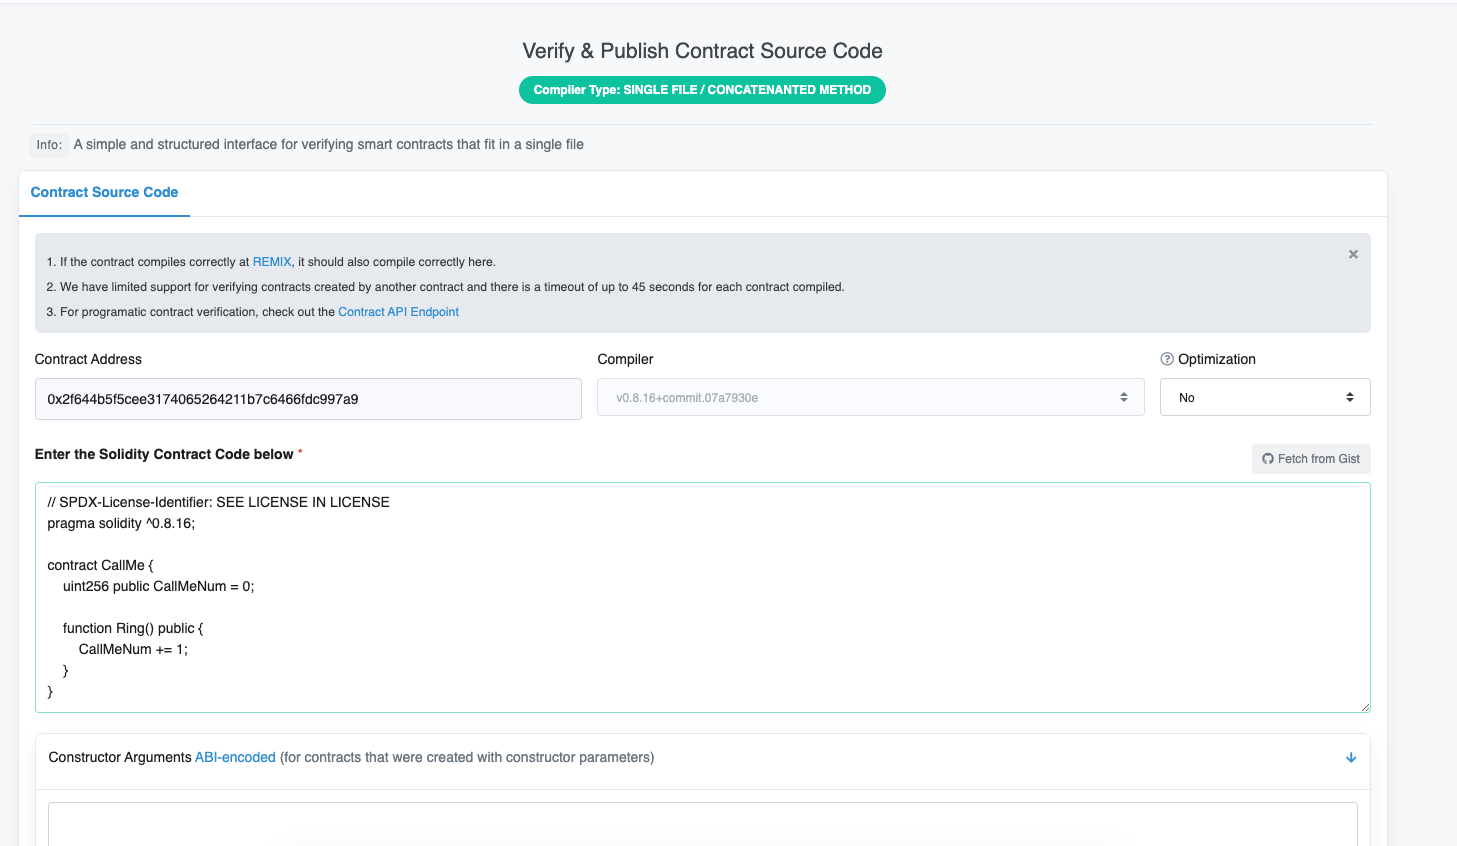
并上传自己的sol代码,直接提交,不用管其他的输入框。看到Compiler Output就OK了。
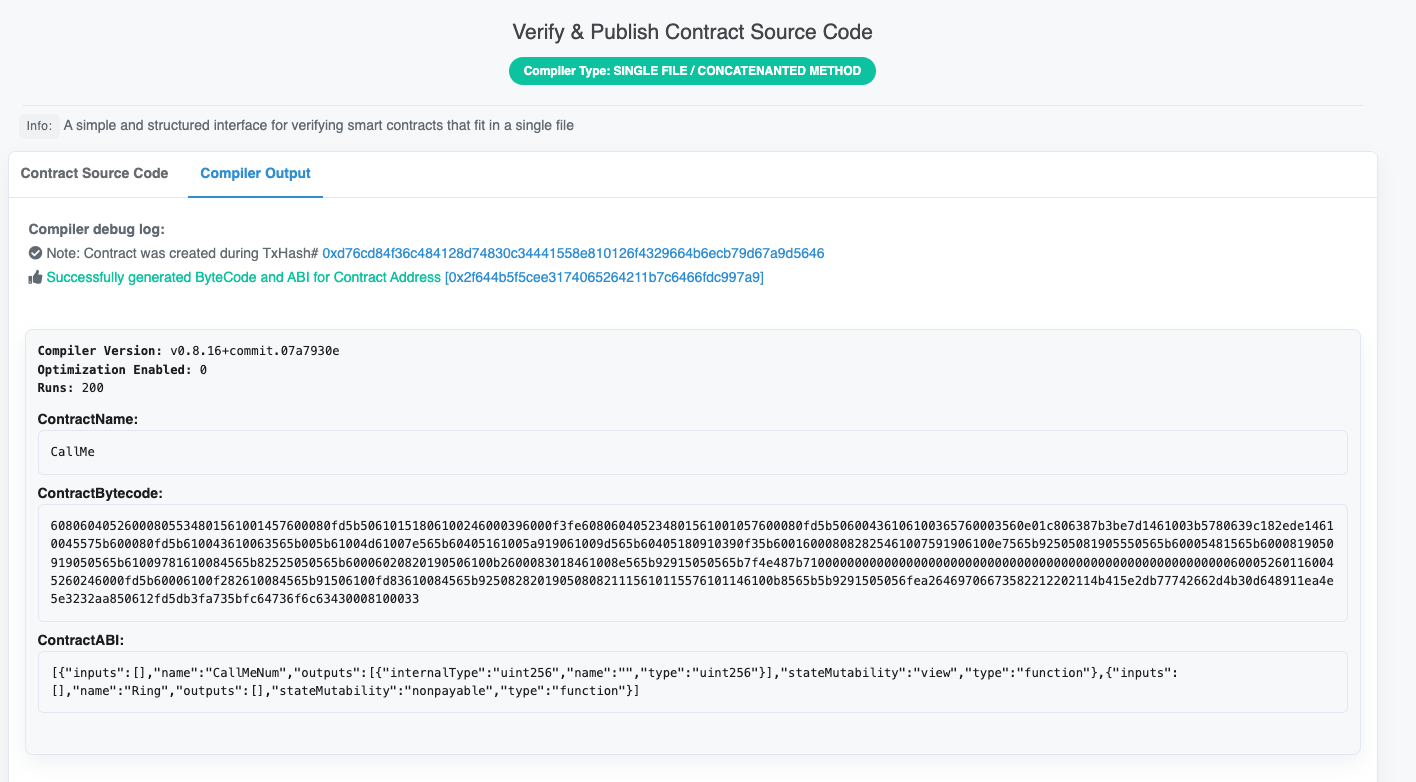
这样我们就能在区块浏览器直接执行我们的合约方法。回到我们的合约地址,查看Read Contract:
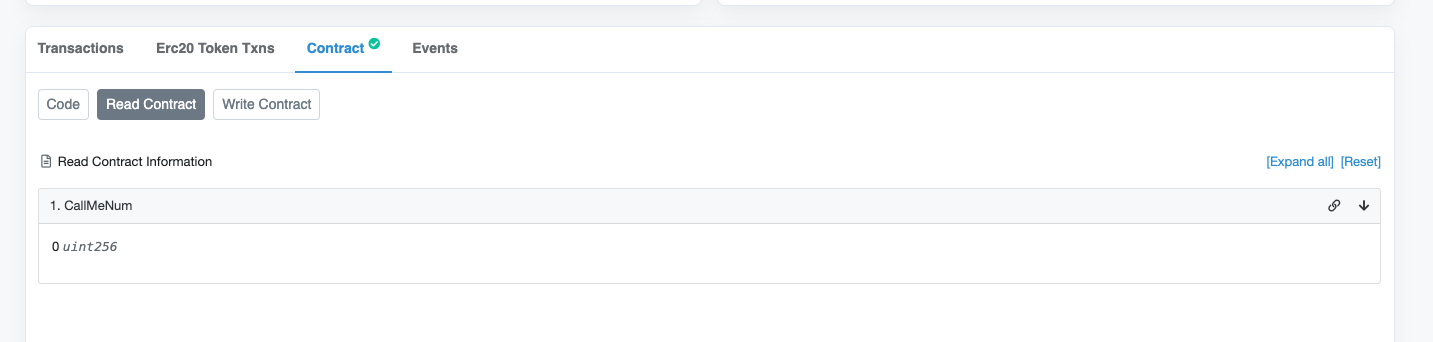
这时我们的CallMeNum是0。我们在Write Contract先Connect to Web3,使用metamask连接。
并点击Ring下面的write按钮。
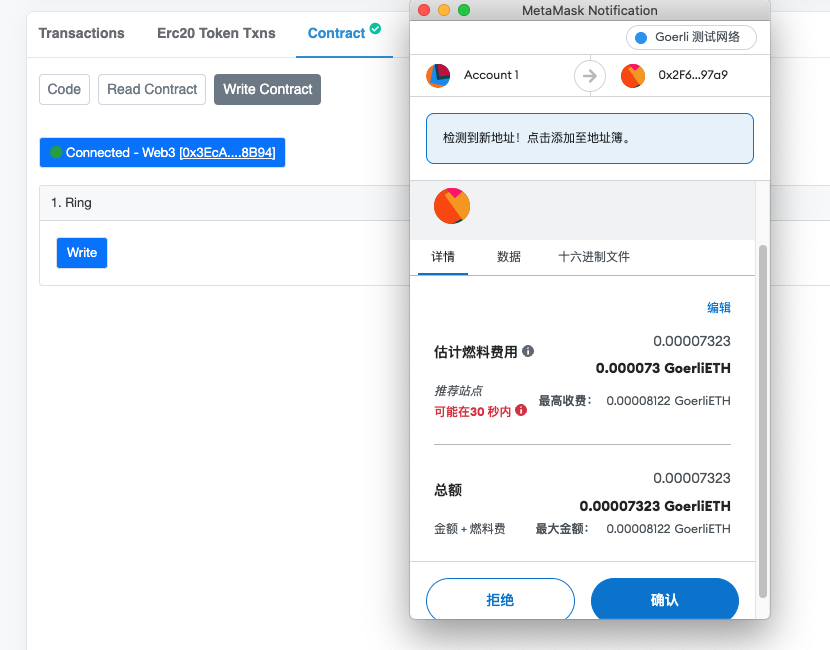
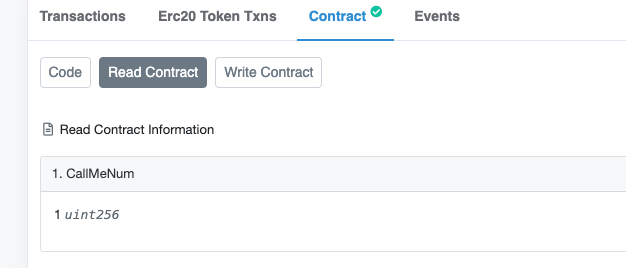
这里我们确认,并等待交易完成。这时候刷新页面,进入Read Contract,会发现CallMeNum变成了1。
OK,在这里我们完成了智能合约的编写,编译,部署,区块浏览器确认合约,执行合约方法。over~
评论区